Sniff is a "Scratch-like" programming language that's designed to help Scratchers move gently from Scratch to more conventional languages. They can start writing programs, without having to learn a new language because Sniff is based on Scratch. They learn a little more about variables, compiling, syntax errors (!), and they can have fun controlling real hardware while they're doing it.
Showing posts with label Games. Show all posts

Tuesday, 2 May 2017

Pokemon TCG: Greedy Dice

Pokemon have been quite a thing in the Sniff household for the last year or two (before "Go" and Sun and Moon made them trendy again), but a recent expansion has been into the Trading Card Game. For those who haven't played, its a card game played with Pokemon cards. However while the basic game is reasonably fun, what makes it interesting is that you can choose what cards make up a your deck. When you get ripped off at Asda's for a "booster pack" it provides 10 new cards, which you can use to replace  cards previously in your deck. Generally you can think of it as a giant game of rock paper scissors, where some cards are better than others, but even some of the weaker ones can come into their own under the right circumstances, so picking the right cards to use is critical.

One card such card is called "Greedy Dice". Within the game there is a pile of 6 "prize" cards, dealt randomly from your deck at the start of the game. Each time you knock out an opponent you get a prize card from your own pile, and if you get all 6 you win! The rule for greedy dice is, if its drawn from the prize pile, you toss a coin and if its heads you get to take another prize card! Two for the price of one!

However once you actually think about it, is it really such a great card to have in your deck? You're limited to 60 cards, so if you put a GD card in, you need to take something out, so you need to be pretty sure its worth it.

So lets do the maths... from 60 cards you have a 1 in 10 chance that one of the 6 prize cards is the GD card. So you'll get something good 1 game in 10? Well not so fast... there are six prize cards, but GD is only useful if one of the first 5. Getting to take an extra prize card does'nt' really help if you've already won. Worst, we forgot about the coin toss, so we get a benefit less than 1 game in 20.

OK that's a bit pointless, but what if we go for it! You're allowed to have up to 4 of each card in your deck, so what happens if we put 4 of them in. That's a big chunk of deck space, but hopefully we'll start to get something out of it...

Now the maths gets a bit more complex, so lets write a program:

make cardsInDeck number 60
make cardsInPrizes number 6
make greedy number 4

make cards list of boolean
make prizes list of boolean


So here we've got 60 cards in a deck, 6 of them are placed as prizes, and of the whole deck 4 of them are greedy dice. To represent the deck and the prizes I've made two lists of booleans - we don't actually care what the cards are, so I'm simply going to store yes or no to record if its a GD.

when game
.delete all of cards
.delete all of prizes
.
.repeat cardsInDeck
..add no to cards
.
.repeat greedy
..delete item 1 of cards
..add yes to cards

So here we go setting up a game. We clear out the cards, and the prizes, and then add 60 regular cards to the list. Then we replace 4 of those with greedy dice. Now we're ready to play!

The game starts when we deal our 6 prizes:


.
.repeat cardsInPrizes
..set deal to pick random 1 to length of cards
..add item deal of cards to prizes
..delete item deal of cards
.

Here we pick six random cards from the deck and place them in the prizes. Finally we just need to see you many of the first 5 prizes are GD:


.
.repeat cardsInPrizes-1
..if item 1 of prizes = yes
...if pick random 1 to 2 = 1
....change found by 1
..delete item 1 of prizes


We pick up the first prize card and if its a GD we toss a coin. If its heads then we've found (and successfully used) a Greedy Dice card. If its tails then we actually loose out in the game, as normally we'd get a useful card as a prize - GD is useless except to win a second prize. We keep track of the number of times we benefit.


make games number 1000000

when start
.set found to 0
.repeat games
..broadcast game and wait
.say join  "found "  join [found]  join " in "  join [games ] " games"
.say [found/games]


Now all we need to do is play a million games! A fraction of a second later, we discover we got an extra prize 167360 times in 1 million games. Thats 16.7% or about once every 6 games.
Of course I'm not the first person to figure this out:  Here some one comes up with the number: 15.83% That's a little but lower than our result, but you read closely you'll see that he's calculated the probability that you'll get one or more useful GD in any game, whereas we've counted the number of times GD's help - sometime more than one per game.

To make the two calculations match, we need to change our scoring:

.
.repeat cardsInPrizes-1
..if item 1 of prizes = yes
...if pick random 1 to 2 = 1
....change found by 1
....stop script
..delete item 1 of prizes

Now when we get a good GD card we call it a win for that match, and stop searching. Doing that we get an exact match up.

So not looking good, and about 1 game in 6 to see any benefit. However if you're new to TCG you might want to try the half deck variant - 30 cards and 3 prizes makes the games a little quicker, and its much easier to build a deck from the the cards you happen to have, rather than having to buy extras to make up a sensible 60. If we have 4 GD from 30 we're more likely to pick them for each prize slot (at the cost of taking up a greater proportion of deck space), which should help... except now we only draw 2 useful prize cards instead of 5, bringing the gain down to a useless 13%.

Either way you can probably do something more interesting with those 4 card slots than GD. Maybe in some future expansion they'll add a trainer card which lets you do something more useful with the GD card, but for now its just a dead card!

Saturday, 18 February 2017

Girls Like Robots

I don't play a lot of games, but when I read about the Humble Bundle Freedom Bundle is seemed like an easy buy - lots of games and all the money goes to a good cause. So far the game that's taken up the most of my time is a little puzzler called "Girls Like Robots". It only takes a few hours to play through the whole game, but its a lot of fun.

The premise of the game is easy enough: place cards on the grid so that they all get along with their neighbours: Girls like Robots, and Robots like Girls. Nerds like girls (and robots) too, but they also like being on their own, so they like being on the edge of the board, and they don't like other Nerds. Of course Girls don't like Nerds (while Robots just ignore Nerds).

Here's a typical level (from around the point where its starts go get a little interesting). The grid is 4x3, and the level starts with a Nerd in the top left hand corner. We have to place 4 Girls, 4 Robots, and 3 more Nerds to score as many points as possible. Around 20 will pass the level, 22 to get a "Good" rating, and 26 is the perfect score.

It's the sort of problem that's really easy to solve with a little code - while we could do something clever, the easiest thing to do is just generate random placements and keep track of which is the best one. So lets give it a go!

The first problem is that Sniff only has a List which stores things in order - there's no easy way to obvious represent a 2D grid. We could make a list of strings, with each character representing a grid slot, and each string representing a row, but replacing individual letters would be fiddley.

Instead I made a list of numbers. Each number represents one square, along each row and then on to the next. We use a couple of other variables to store the height and width.

make arena list of numbers
make width number 4
make height number 3

make  empty number 0
make girl number 1
make robot number 2
make nerd number 3

make edge number 99

Now we can just make up a number to represent each card type, and use that number but its going to be much clearer if we use a constant. I've declared empty, girl, robot, and nerd so I can put them in the list without having to remember what actual values I used. I've also declared edge, which will come in handly later.


when print
.make message string
.make counter number
.make card number
.set counter to 1
.repeat height
..set message to ""
..repeat width
...set card to item counter of arena
...if card=empty
....set message to join message "."
...if card=girl
....set message to join message "G"
...if card=robot
....set message to join message "R"
...if card=nerd
....set message to join message "N"
...change counter by 1
..say message

The first script I wrote was to print out the game status. We go along each of the rows, checking the square, and depending what it is we add a suitable letter to the message. When we reach the end of the line we print out the message and go around again.

The next thing I wrote was something to place a card somewhere in the grid:

make card number
when placeRandom
.make x number
.make y number
.make counter number
.forever
..set x to pick random 1 to width
..set y to pick random 1 to height
..#say join [x] join "," [y]
..set counter to (y-1)*width+x
..if item counter of arena =empty
...replace item counter of arena with card
...stop script

I generate a random x,y coordinate and then calculate the index of that square in the list. This is a bit tricky but basically each step in Y moves us down the grid one square, which moves us on by width steps through the list.

If the square us currently empty then we place the card in the square and we're done. Otherwise we go around again and try another square. With that in place its pretty trivial to fill up an entire grid with a random layout:

when fillArena
.broadcast makeEmpty and wait
.replace item 1 of arena with nerd
.repeat 4
..set card to girl
..broadcast placeRandom and wait
.repeat 4
..set card to robot
..broadcast placeRandom and wait
.repeat 3
..set card to nerd
..broadcast placeRandom and wait

Or at least almost random: As per the level above, I've placed a Nerd in the top left, then placed 4 girls, 4 robots and 3 nerds randomly. Of course I've been testing all of this as we go along using something like this:


when start
.repeat 10
..broadcast fillArena and wait
..broadcast calcScore and wait
..broadcast print and wait
..say ""

Which simply prints out 10 random card layouts.

Now for the hard part - we need to calculate a score for a card layout.

when calcScore
.make counter number
.make x number
.make y number
.set score to 0
.set counter to 1
.repeat height using y
..repeat width using x
...set card to item counter of arena
...
...if x>1
....set neighbour to item counter-1 of arena
...else
....set neighbour to edge
...broadcast calcCompatability and wait
...
...if x<width
....set neighbour to item counter+1 of arena
...else
....set neighbour to edge
...broadcast calcCompatability and wait
...
...if y>1
....set neighbour to item counter-width of arena
...else
....set neighbour to edge
...broadcast calcCompatability and wait
...
...if y<height
....set neighbour to item counter+width of arena
...else
....set neighbour to edge
...broadcast calcCompatability and wait
...
...change counter by 1

So to do that we go through the grid one square at a time, and calculate its happiness score. First we get the card thats in the square itself (item counter of arena). Then we check each of its neighbours starting with its left hand neighbour at counter-1.  If course that won't work if we're on the left hand edge (x=1), so we check that x>1 and if its not we set the neighbour to be an edge (in other games we might be able to use empty, but remember Nerds like being on an edge). 

Having set card and neighbour we then call calcCompatablity to actually work out that pairings contribution.

when calcCompatability
.if card=girl
..if neighbour=robot
...change score by 1
..if neighbour=nerd
...change score by -1
.
.if card=robot
..if neighbour=girl
...change score by 1
.
.if card=nerd
..if neighbour=girl
...change score by 1
..if neighbour=robot
...change score by 1
..if neighbour=edge
...change score by 1
..if neighbour=nerd
...change score by -1

This is where the "game logic" really lives. Here you can specifically see that girls like robots and don't like Nerds. As you can see Nerds are by far the most complex, as they have a reaction to pretty much every other card.

Finally all we have to do is generate lots of random layouts and see which is best:

make hiScore number
when start
.repeat 10000
..broadcast fillArena and wait
..broadcast calcScore and wait
..if score>hiScore
...set hiScore to score
...say [score]
...broadcast print and wait
...say ""

And when we do something strange happens... it suggests the solution:
NRNG
RGRG
NRGN
Which it thinks will score 27 points on a level where the "perfect" score is 26... 
And there it is!!! 27 points!!!

In later levels we get to add in new cards - Pies (pie makes every one happy, except robots) and baby seals (everyone loves baby seals, but they hate girls), fish and cows. There's also the rule that robots can get too excited and panic if they're surrounded by 4 girls. Some of these are a bit more tricky to implement as they don't just apply to a single pair of cards, but with the framework in place its fairly simple to add these extra features.

Check out the Humble Bundle, and Girls Like Robots. They're almost as much fun as writing the solution!

Tuesday, 26 January 2016

Sniff 64 Handheld Game Console

A few months ago we posted about writing a Flappy Bird  running on an Arduino, and displaying on a max7219 8x8 led matrix. We thought it as so much fun that we followed up and wrote Space Invaders, Lunar Lander, Breakout, Snake and Defender. Code for all of these is in the current Sniff release examples.

We liked it so much we decided that we needed to build some kind of handheld game console to run these that we could use as the basis of workshops. We wanted kids to be able to come in, and build their own then write a game to run on it.

What followed was a few months of intense design work. What's left is something that (as J Ive would say) looks effortless... its a very basic "obvious" design, but every aspect was deliberated over.  Here are just some of the design issues we grappled with:

The Controller

An Arduino Uno was used for the original tests, but for a while we intended to swap it out for a Nano. These are functionally identical, but smaller. We also found a screw terminal board for the Nano which in theory would make it simple to attach components semi-permanently to the board. However when we actually tried to assemble a system based on the Nano, we found the screw terminals incredibly fiddly to work with, and something we wouldn't inflict on kids! (We do use screw terminals to connect motors in our robot workshops, but they're a bit larger). With that tested and rejected we went back to the Uno!

The Screen

One of the things we learned from writing games on the red matrix was that 8x8 pixels was actually a really great size to code games on. The Arduino can handle it easily and you don't need to worry about performance. There's also something really pure about these games - there's no artwork or other asset creation. They're 100% game mechanic. However we did find that it was sometimes hard to know what each pixel was supposed to be - one red dot looked a lot like every other!

That could be solved by adding colour support, and we recently posted out findings from testing every 8x8 matrix we could get our hands on. Our favourite was the bi-colour red/green display using the tm1640 driver. These are a bit hard to find, but they give just enough colour at a price and size that we liked. The next step up would be a neoPixel solution, which was just a fraction above our budget. The cost needs to be sufficiently low that every student gets to take one home, without costing us a fortune.

Controls

The original design had several different control configurations. We quickly got a design with a thumbstick and a button, but when we started refining it into something we could make, we couldn't find a nice button that didn't cost more than the thumbstick, and the thumbstick includes a button. We then briefly considered the idea of two joysticks - one basically replacing the button. This would have been fun,  even allowing for two plays games, but it proved impossible to lay out the components in a way that would be a comfortable size and shape to hold. In any case it was just too complicated, so we simplified and just went with a single thumbstick and its built in button.

One slight niggle is that the switch in the thumbstick connects the output to 0v when the button is pressed, otherwise its open circuit. Negative logic is needlessly confusing for kids (the pin turns OFF when its pressed!), but the alternative of wiring the power to it in reverse (which would work!) is also pretty nasty. We also needed to add a pull-up resistor - its easier to solder an extra resistor to the board so that it just works, rather than to explain pullups in a workshop context.

Sound

We used a buzzer so that you can just set it to "on" to get a sound. As an alternative you could use a speaker, so that you need to send a square wave to it, but we just need a few beeps. Just having the thing beep when something happens makes a big difference to the feeling of playing a game, and while we could do more, as with the controls we were happy to go with something simpler.

Power

In the initial design we were going to use AA batteries - Probably 3 of them connected directly to the Arduino's power bus. However then we'd need to worry about getting the right polarity, having some kind of power switch, and it was difficult to find a layout for the case which would hold batteries. We also considered using a USB power pack - the sort that are meant for recharging your phone when it goes flat, and you're away from home. These work great and are very cheap, so we will probably bring some along to the workshop, but in the interested of simplicity we decided to stop short of building a power supply into the design. We can power via the USB port - not exactly portable, but you can always use an external USB battery.

Physical Assembly

A big part of this project is that we wanted something that was relatively solid and robust, while still being "made". We spent hours trying to work out how to juggle all the parts into something that would feel right, and many of the decisions made for the components were influenced by whether we could put them together and lay them out nicely (and cost effectively).

The easiest way to construct a custom case was from two layers of 3mm acrylic - a base to hold everything and a top layer to protect it (we did consider some designs with three layers but again it added to complexity). The base could be coloured, but top clear so that the screen could be underneath it. We included mounting holes for that Arduino, as it has a well defined spec, but the rest of the components are attached with double sided foam tape. This is easily strong enough to hold everything in place and avoids the problem that the screen lacks any mounting holes, and each batch of joysticks we buy has the holes in different places!


The final piece of the puzzle was making it as easy as possible to wire all of this up in a way that would be easy to do in a workshop, but still relatively robust. The Uno isn't really designed for this as is has female headers. Male header pins, and female jumper cables are much stronger than female headers, and male jumpers.

The screen requires 0v, 5v, plus two data pins, and comes with female jumper cables. Our first trick is to attach these to the Arduinos ICSP pins!

The cluster of six pins at the end of the Uno (that you probably never use) can be used to program the board, but they're actually just pins D11, D12, and D13 broken out. We chose to use pins 11 and 12 to attach the screen so that we could connect them here rather than in the usual female headers.

The added bonus is that not only are they stronger, and use the supplied cable, but they're lower than the regular headers, so this makes the whole device thinner. This is important if we mount the joystick on the base plate and poke it through a hole in the top plate.

Unfortunatly the Uno doesn't have any other male headers so we need to get really creative... We took a sheet of strip board 9 strips wide, and soldered two sets of 4 straight pins and two sets of 4 angled pins on to it. 


The straight pins will fit perfectly into the analog and misc/power headers, with the angle pins pointing inwards and down so they take up no extra space. Then we can easily attach female jumper cables to them, making a simple, secure and low profile connection.

The joystick connects to A0,A1,A2 0v and 5v, leaving a spare 0v and A3 to connect the speaker to! The joystick can use a regular strip of female jumper cables so the only soldering we have to do is to make up the angle connector, and solder some headers onto the speaker. This is a big deal when you have to make up a batch of components before a workshop!

With everything mounted and connected we just have to attach the top sheet of acrylic using spacers and we're good to go!  We used 25mm spacers for the prototype, but that leaves plenty of space, and we're using 22mm for the next batch (20mm would probably be OK too!).

And here it is...

After an innuendo packed brainstorming session we completed the project by picking a name for our creation. We've named it the Sniff 64, or S64 for short. After all it does have 64 pixels.

Code to run on it is included in the examples/Embedded/maxGamer folder in the current release. The code should be set up for the "official" hardware, but if you want to run it on a different screen you should just have to change the first few lines of code.

We put Snake on it and left it "lying around" near some kids, and it proved very popular.

If you'd like to build on then the details here should make it pretty easy to put one together yourself.  The only "tricky" part is getting the acrylic cut - if you've got access to a laser cutter, then its pretty easy (I'll post the DXF here once its final-final, or get in touch). Otherwise you can just mount it to any single sheet, and forgo the top layer, or get creative see what you can come up with.

Friday, 22 January 2016

Fake "PSP" Gameboy Advance Emulator

One of the goals of porting Sniff to Gameboy Advance was to get games running on something that felt like real game hardware. But what should you do with your GBA files once you're done?

Well the best thing is to get yourself a real gameboy advance, and a "Flash Cart". These are special GBA cartridges with and SD card slot, so you can simply put your game onto them. Then you can play them pretty much as if they were a real game. That's pretty neat. Unfortunately Flash Carts have become harder to find as the GBA becomes increasingly obsolete.

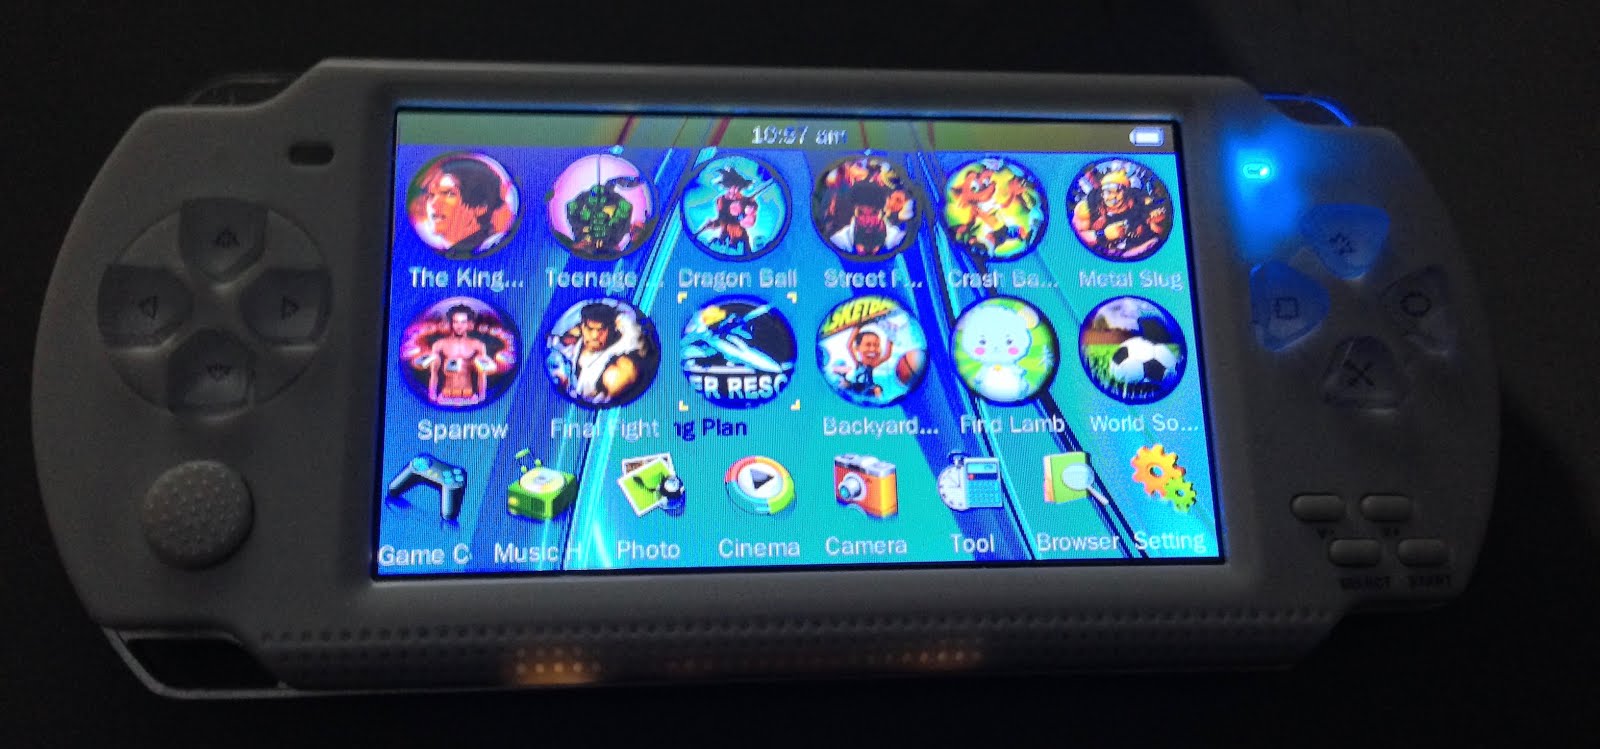
However in our regular trawls of the internets flea markets we came across an interesting device that looks like a PSP. However instead of playing Sony games they run a Gameboy Advance emulator! While that's not as cool as running on the original hardware, they are "real" handheld game consoles that look the part, and include both built in storage (so you can download games over USB) and a microSD card slot, so you can put games on that.

Best of all they cost under £20, so we ordered one to find out what they were like!

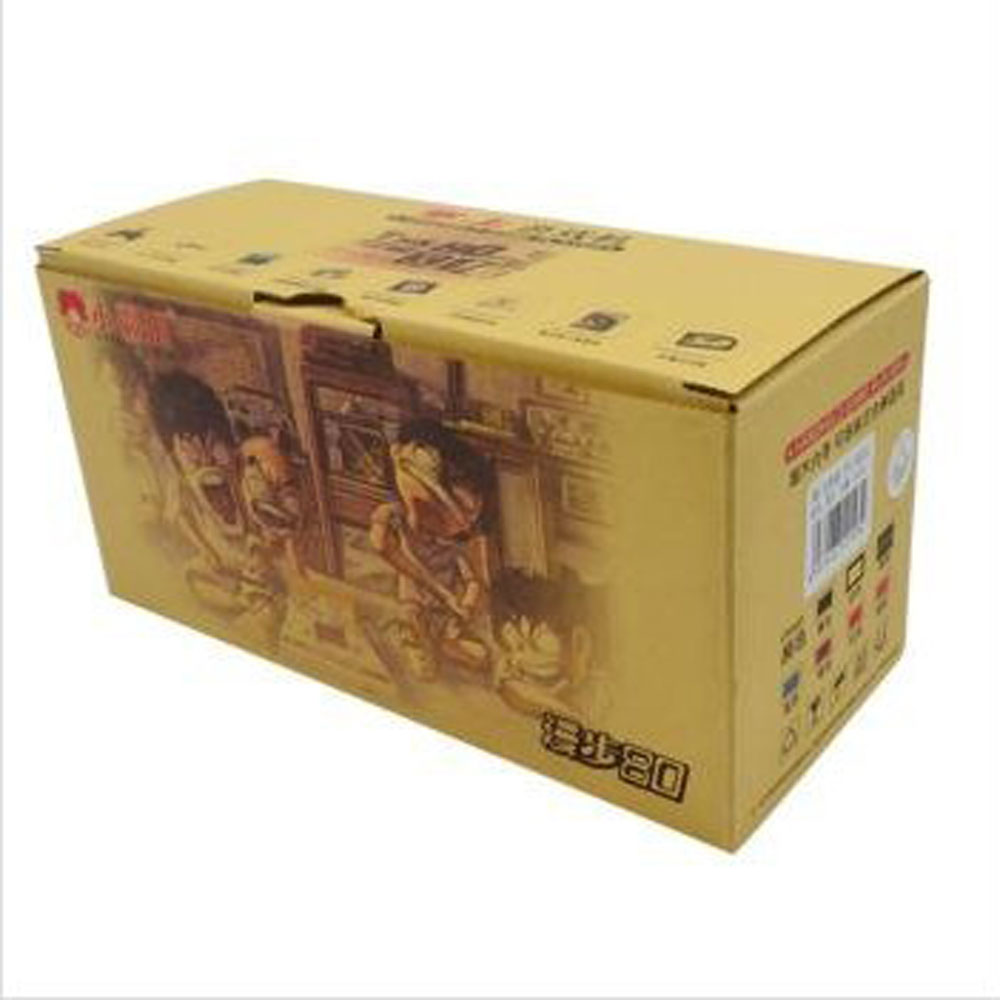
Within a couple of weeks one arrived direct from China. It came in a fun box, and included a set of headphones and  a USB cable but no charger, so we plugged it into a computer to charge. While it was charging we checked it over - I saw a review complaining it felt cheap and plastic... newsflash: it IS cheap and plastic. Anyone who is surprised by that I don't know what they were expecting, but with any realistic level of expectations its a pretty solid for the price. The screen and feel isn't as nice as more expensive consoles, but its decent enough. Mine appears to have a stuck pixel, but then again one time I had a stuck pixel on a new MacBook Pro (I wasn't happy when I was told it was "within tolerance", and shouted until I got a replacement) - in this case I'll live with it.


Within a few minutes it was charged enough to power up and gave me the option to operate in disc mode, charge or charge and play - so of course we chose charge and play.

The thing comes loaded with dozens of commercial games... Mostly GBA, but some other consoles are supported too. A lot of them seem to be odd street fighter/mortal combat clones in a variety of languages (including Japanese, Chinese, and French!). Firing them up and they mostly play pretty well. While most of them are pretty lame, there are couple of prime western titles mixed in there. One strange feature is that even though both the GBA and this device have shoulder buttons, the GBA shoulder buttons are mapped to triangle and square. Select on the device exits the game, and the right shoulder button acts as GBA select. It's all a bit odd. There seems to be some suggestion that the keys can be remapped, but I couldn't figure out how.

It's really hard to take pics go the screen!

Outside of games circle seems to be the "Activate" button, Cross is back, and square is change - this is odd, but works OK  once you're used to it.

However we're not here for the pirated games! Really... we're not! In fact I could see them being a serious distraction if we try and use these for workshops. Some of the "built in" games are actually on the internal storage, and can be copied to a computer, then deleted to free up space, but a good chunk of them are part of the firmware, and can't easily be removed.

At this point we found we couldn't turn the thing off while plugged into a power source... very odd. Also to turn it ON when not connected you need to turn on the power switch, and press and hold start! Well now you know!

Anyway we put the thing in USB storage mode, and it appears as mass storage. There's a folder called games, so we made folder called Sniff inside that, and dropped in Bounce Out, Asteroids and Catch the Flowers (we'll talk about porting them to GBA in a future post).

Ejecting the disk, the thing powered into its normal mode, and we were off! Selecting Games showed the Sniff folder and we selected each game... They all ran perfectly!!! In fact  they felt smoother than when we ran then on openEMU on my Mac. This might have been helped by the smaller screen, and the feel of a real game console, but they worked great.


One gotcha is the screen resolution... It's higher than a GBA. More problematically its not an exact multiple. There are therefore two ways to run a game - either with a large black border, or "full screen". Unfortunately in full screen mode some GBA rows and columns get doubled up, while others don't. This looked pretty bad for Bounce Out, as the ball wobbled in size as it moved, and the right hand blue line almost disappeared. However for most games full screen looked pretty good.


Overall this seems to be an awesome toy. I could see us buying a set of them to use with kids in more advanced workshops in the future. Proof reading through this I note I've used the word "odd" quite a few times, and this is certainly a device that has its quirks, but the "in-house test team" who did the artwork and sound for Catch the Flowers were pretty blown away to see their own game on real hardware. For less than £20, that's got to be worth it!

Tuesday, 19 January 2016

Gameboy Advance Graphic modes in Sniff

A week or so ago we posted on how you could now make Sniff programs to run on the Gameboy Advance.While the hardware is a little old now, its a real console and running stuff on it is way more exciting than just drawing on a regular screen. So far we've just focused on getting stuff going, so today I'm going to start with some drawing code.

To draw on the GBA screen you need to use the gbaScreen device:

make display gbaScreen device 4
make displayX number
make displayY number
make displayColor number
make displayFlush boolean
make message string


Then you can use standard Sniff drawing operations to tell the screen what to do:

when start
.set displayColor to 777
.set displayX to 0
.set displayY to 0
.tell display to "move"
.set displayX to 100
.set displayY to 100
.tell display to "draw"

If you've not used these before, then you probably want to practice drawing on a PC screen first, before going to Gameboy. If you have used them, then they're exactly the same.

The new thing you do need to know about is that the the GBA has six different screen modes. Modes 0-2 are "tiled" modes, and while these are actually used for most real GBA games, they're a bit more tricky to understand, so we'll leave them for now. For regular drawing you need to use modes 3,4 or 5. Each has its own tradeoffs...

Mode 3 is 240x160 pixels with full colour. Unfortunately this uses up all of the GBA's graphics memory, which means it can't do double buffering or page flipping. In mode 3 the Sniff displayFlush has no effect, and all drawing goes directly to the screen, which means it can be very flickery unless you're careful.

To avoid flickering we need two screens worth of memory, and then we display one, while drawing to the other. Then we flip them over and all of our drawing appears instantly, without any flickering! Great, but we don't have enough memory for a full screen of full colour - something has to give:

Mode 4 is full resolution (240x160) but uses 8bits per pixel instead of 16. This isn't too bad, as Sniff generally uses a 9bit colour model(000-777). Unfortunatly this mode can also be a little slower due to the way the hardware handles memory.

Mode 5 keeps full colour but uses a lower resolution of only 160x128. Again we get the benefit of being able to keep two screens in memory, so we avoid flicker, but the low resolution looks a bit odd on screen.

Generally we like mode 4 the best, but you can run your code easily in any mode just by setting the parameter when you create the display device.

And that's all you need to know. You'll find examples of this kind of drawing in examples/GBA/window.sniff and there's GBA port of bounce out in examples/GBA/bounce.sniff

Sprites, Bitmaps, and Sound we'll save for another time.

Wednesday, 13 January 2016

Sniff on the Gameboy Advance

One of the things that we hear talking to teachers and kids is that they want to make "real" programs/games that run on actual game consoles and devices. While the GameBoy Advance is a little old now, but it fits the bill as a real commercial gaming device. As its a little older, it has the advantages of being cheap, well documented and its relatively easy to get code onto it, so now you can actually make your own game in Sniff, and download it into a cartridge, and the plug it into a GBA and have your own game running on a real device.


Assuming that you're already running Sniff, the next thing you'll need to do is install devkitARM. The instructions for this are a bit hit and miss, and are are directed more towards the Nintendo DS, but you just need to install the main devkitARM package and the libgba package and you're ready to go. Don't forget to set up the environment variables, as instructed on the dkARM install page.

With that done, go to the Sniff/examples/GBA folder, and we're ready to make a program.

make AButton digital input 0
make BButton digital input 1
make selectButton digital input 2
make startButton digital input 3
make rightButton digital input 4
make leftButton digital input 5
make upButton digital input 6
make downButton digital input 7
make leftShoulderButton digital input 9
make rightShoulderButton digital input 8

when start
.forever
..if AButton
...say "A"
..if BButton
...say "B"
..if startButton
...say "start"
..if selectButton
...say "select"
..wait 0.1 secs

All of the GBA buttons appear as digital inputs, so can read them easily. By default the GBA screen is set up in a simple text mode, so you can print things to it using "say". This isn't something you're going to use very much, but putting together the buttons, and "say" allows us to check that everything is working correctly.

You can compile this using the command "gba-sniff buttons.sniff" and you should get a file called buttons.gba which is an actual GBA rom image. The easiest  way to play it is to use an emulator - I used openEmu. That allows you to just fire up your ROM on you computer, and you can play it straight away.


However if you want the "real" experience you'll need a "flash cart". A few years ago everyone had one of these, and they were easy to get hold of, but they're a bit more obscure now. If you shop around you can get one, and then just copy your ROM onto an SD card, plug it into your GBA (or an original DS, which can play GBA carts), and you're instantly transported back to 2002.

There is third way which we're currently investigating... Floating around eBay and Aliexpress are handheld consoles that include a GBA emulator. These cost less that £20 and you can download your game straight into one of those via USB, and get a real handheld console experience. We've got one on order, and we'll report back when it arrives.

There's a lot more we need to say about using GBA graphics, sprites and sound - all of which are fully supported in Sniff. There's example code for using them all in the examples/GBA folder, and they work pretty much the same as they do on other Sniff devices, but I'll write more about them in a future blog post.