Sniff is a "Scratch-like" programming language that's designed to help Scratchers move gently from Scratch to more conventional languages. They can start writing programs, without having to learn a new language because Sniff is based on Scratch. They learn a little more about variables, compiling, syntax errors (!), and they can have fun controlling real hardware while they're doing it.

Thursday, 20 August 2015

Round and Round

So a few hours ago Jens Monig (of Snap fame - sorry I don't know how to type the accent!) posted a link to a video which someone had made. This version is done in CSS! Jens suggested doing it in GP and/or Snap, and shortly afterwards posted a link to his version.

Not to miss out on the fun, I thought we could do it in Sniff, and to make it even neater, make it run on Arduino!

make i2c device 8

make display oled device
make displayX number
make displayY number
make displayColor number

make displayFlush boolean

The first thing to do is create a display device. I actually tried this on a few devices, but the big tft display was too slow to refresh. I also found a could to bugs that have slipped into Release 20, concerning Arduino displays. We're currently deprecating the drawImage function, and moving to a more powerfull bitmap architecture, and a couple of devices got left behind... sorry! Anyway we're pretty much limited to a small display to be able to get the necessary performance from both the Arduino and the bus transfer, so we went with the classic 128x64 i2c OLED device. As its the only device we need, we can speed the bus up a little - I chose to run the bus at 8x normal speed, which words great with my setup - if it fails for you, drop the speed down until all is OK.

make theta number
make radius number
make centreX number
make centreY number

when drawSemiCircle
.make tmpTheta number
.set displayX to centreX+radius*cos of theta
.set displayY to centreY+radius*sin of theta
.tell display to "move"
.
.set tmpTheta to theta
.repeat 36
..change tmpTheta by 5
..set displayX to centreX+radius*cos of tmpTheta
..set displayY to centreY+radius*sin of tmpTheta
..tell display to "draw"

Next we need to draw a semi-circle. Normally I'd avoid using sin/cos when drawing circles. You can also get some good speedup by exploiting symetry, but for something thrown together, this code is simple and obvious.


With that out of the way, the rest is easy:
make circles list of number

when start
.make index number
.set centreX  to displayX/2
.set centreY to displayY/2
.set displayFlush to no
.
.repeat 10
..add 0 to circles
.
.forever
..set displayColor to 000
..tell display to "clear"
..set displayColor to 777
..set radius to 3
..repeat length of circles using index
...set theta to item index of circles
...broadcast drawSemiCircle and wait
...change radius by 3
...change theta by index

Display devices have this nice feature that on initialisation they set displayX and displayY to their resolution (did I not tell you that before - sorry! its handy!), so we can easily centre the circles on the display. We want everything to refresh in one go, so we turn flushing off.

We're going to have to circles, so we store the current angle for each of them in a list. We don't really need this as we could calculate the values as we need them, but it does make things easier. Initially they're all lined up. so theta is 0.

Now we loop forever: clear the screen to black then draw each of the semi circles, increasing the radius by 3 each time (10 circles-> max radius of 30, max diameter of 60, just fits nicely!). The optical trick is that as we go out each circle spins faster, so we change its angle by index each time - the inner circle moves by 1 degree, the outer by 10 degrees each frame. The result:


And here it is! If you don't have the hardware to run this on Arduino, then it runs just as well on the desktop - just change the device to a "window" device (remember to "getEvent" every now and then to keep the window server happy), and then tweak the speed/size to suit your taste!

Tuesday, 18 August 2015

Scratch2015AMS

I've just got back from a crazy week in Amsterdam at the Scratch2015AMS conference. From the opening reception through till after the final close it was packed from breakfast till bedtime with constant events and activities, so we're pretty exhausted.

Amsterdam was hot and humid, and on getting back to the hotel on the first night there was just enough time for a quick experiment to see how hot and how humid - I'd brought 10 Arduino's with multi shields and dht11's for our workshop session, so quickly programmed one up to find out that it was 26 degrees and 70% humidity. Opening the window dropped the temperature to 20 which helped a lot, but (there's a bit of physics here...) the colder air can't hold as much moisture, so the relative humidity increased  to an mind boggling 80%. DHT11's are only rated to read up to 80%, and we maxed it out.


The next day was our workshop on using Sniff with Arduino. We'd run the same workshop a few weeks previously for the Bournemouth Festival of Learning, but we did that in our own lab space, which is set up pretty nicely. Our biggest concern was getting everything setup on other peoples machines. This was indeed a bit chaotic, and it really didn't help that our "workshop" had been scheduled in a lecture theatre. Tom works with Steve Heppell on his "learning environments" projects, and between the heat, and the layout this was a pretty bad learning environment. However we muddled thorough, and once we had things installed on a few machines it went more or less according to plan.

One of the workshop participants was Phil Bagge, who I'd not previously met, but who teaches in a school 6 miles from my home! Of course sometimes you need to go to Amsterdam to meet people face to face. The workshop also gave me a chance to meet Sjoerd Dirk Meijer who works with Ton Smit - a keen supporter of Sniff.


We also gave a short presentation on our paper which is in the proceedings. For academic reasons it was useful for us to be able to "publish" something, but meant we missed out on presenting a Poster.

At most conferences "posters" are the session where presenters stand in front of their board, while everyone else ignores them, but not at Scratch conferences. We had a great experience presenting a poster last year, and the session was just as exciting this year. We got into a few arguments with people about higher level thinking in programming (all in good fun I hope!), and met up with  the Arduino Unleashed team. They're exporting Scratch to Arduino to run standalone. Their work therefore involved hooking into the Scratch block system, and compiling that to Arduino code. We're hoping they'll consider putting their code on top of Sniff, as their front end is something there's demand for (but outside the scope of what we do with Sniff), but the Sniff backend is much further developed.

In the evenings there was drinking and talking in the awesome Waag Building, including some serious talk about putting Sniff on a commercial educational robot. There evenings also played host to teachmeet sessions, which gave lots of people a chance to informally present stuff that we might have missed otherwise.

On the final day there was a gap in the schedule, and someone from a third Arduino project sugguested we run an Arduino panel with all of the Arduino projects in the free workshop space. This time the space was perfect for sitting round a table and doing a show and tell. We all demo'd our stuff and it was a pretty good, informal session. Purely by chance Andy from Guildford (again within easy travel distance of Bournemouth!!!) hadn't come across Sniff before, but happened to wander into the session... an hour later he was a total convert, so we'll be setting up some work with him over the next 12 months.

Even after the conference was over the fun didn't stop, as the organisers had negotiated for us to get free entry into NEMO - the Amsterdam Science Museum. A few people probably missed this, as they had to get home, but its an amazing place. It's just full of kids running round and playing with crazy science based activities.

Scratch2015AMS is over, but it was a great week, and we met lots of great people. I'm still recovering but Scratch2016@MIT is only 12 months away, and we're making plans already! 

Sunday, 9 August 2015

10 PRINT "Sniff BASIC" 20 GOTO 10

For people of a certain age one their early computing experiences included going into WHSmiths on a Saturday afternoon, finding a VIC20 on display, and typing:

10 PRINT "I AM AWESOME"
20 GOTO 10
RUN

In less civilised times this might have been extended to include a number of rude words, but obviously this never happened in the 80's. Even to this day, when presented with an 8 bit computer many otherwise normal adults will revert to this deeply instinctive behaviour.

We are of course talking about BASIC - Beginners All-purpose Symbolic Instruction Code.  The language that came with every computer. Even IBM PC's - the original version of the machines all around us originally ran BASIC when you turned them on - DOS was strictly optional!!! BASIC was built into the machine in the same way the BIOS was, on ROM.

In the UK, most home programming was done in BBC Basic, and even to day you'll still find BBC Basic being used - OCR provide many of their examples using it. In comparison to regular BASIC from the 1980's, BBC BASIC (originally for BBC Micro) was excelllent. Goto and gosub where deprecated (or would have been if the word had been in common usage at the time) being augmented with real Functions, Procedures, and properly structured loops. You could actually write decent code on it.

Back then we had BBC BASIC 2. Official Acorn releases progressed though the Master and Archimedes series, but by that time a generation BBC hackers had gone off to university, and got their hands on bigger toys. I moved rapidly from BASIC to Pascal to C and by the early 90's to Objective-C. These (and pretty much any modern programming language) are all much better programming languages. But I spent most of my childhood writing BASIC on a BBC micro (the same machine which is still plugged in and operational on my desk right now), and remember it fondly.


So how about we implement BASIC using Sniff! We love to see how far we can push Sniff, so lets see if we can implement a programming language using it!

make currentLineNum number
make currentText string
make currentTextIndex number

The implementation is centred around these three variables - currentLineNum is the line number of the BASIC program that we're executing. currentText is the text of that line, and currentTextIndex is how far we are through it.

when start
.set currentLineNum to 0
.forever
..ask ">" and wait
..set currentText to answer
..set currentTextIndex to 1
..broadcast getNumber and wait
..if tokenOK
...set currentLineNum to numVal
...broadcast insertLine and wait
..else
...broadcast doLine and wait

This is the code to the main interactive loop - print a prompt and get back line of text. If it begins with a number then add it to the stored program, other wise try executing it.

The script getNumber is key and along with getWord, and getString are the basis of our "lexical analysis" - breaking the text into its useful parts.

when getNumber
.
.broadcast eatSpace and wait
.
.set tokenOK to yes
.set wordVal to ""
.
.repeat until not tokenOK
..broadcast isDigit and wait
..if tokenOK
...set wordVal to join wordVal letter currentTextIndex of currentText
...change currentTextIndex by 1
.
.if length of wordVal >0
..set numVal to value of wordVal
..set tokenOK to yes
.else
..set tokenOK to no

It checks that the next bit of text is indeed a series of digits, and turns them into a number. If it succeeds it sets tokenOK to be true. getWord and getString are similar.


The work of running a program take place in doLine:

when doLine
.make command string
.
.forever
..repeat until currentTextIndex >length of currentText
...broadcast getWord and wait
...if tokenOK
....set command to wordVal
....
....set tokenOK to no
....
....if command="LIST"
.....broadcast doList and wait
....
....if command="PRINT"
.....broadcast doPrint and wait
....
MORE STUFF GOES HERE!!
....
....if length of command=1
.....broadcast doAssign and wait
....
...else
....if currentTextIndex>length of currentText
.....set tokenOK to yes
...
...if not tokenOK
....say join "MISTAKE AT LINE " join [currentLineNum] ":"
....set currentLineNum to 0
....stop script
...
..if not currentLineNum=0
...change currentLineNum by 1
...broadcast getTextForLine and wait
..if currentLineNum=0
...stop script

We try to getWord and if that works we use that as the command. We then check the command against all the BASIC keywords, and call scripts to handle which ever matches. Simple implementations of BASIC only allow single letter variable names, so we can identify an assignment when we see a single letter "command".

If we get to the end of the loop and either we haven't found a matching command, or we did, but it generated an error itself, then we print out the error message, and stop running the program.

We use currentLineNum of 0 to represent that the program isn't running, and we're exectuing whatever was just typed in, so if the line number isn't zero we increment it and call getTextForLine which searches for the next line of code (which is held in a list of strings called lines).

With that in place most of the rest of the code is simple:
when doRun
.set currentLineNum to 1
.broadcast getTextForLine and wait
.set tokenOK to yes

for example to run the program we set the line to 1, and call getTextForLine which sets up the next line to be executed, loading it into currentText, and setting currentLineNum appropriately (the next line probably isn't currentLine+1, but rather something bigger than that).

when doGosub
.broadcast getNumber and wait
.if tokenOK
..add currentTextIndex to stack
..add currentLineNum to stack
..set currentLineNum to numVal
..broadcast getTextForLine and wait

when doReturn
.set currentLineNum to item last of stack
.delete item last of stack
.broadcast getTextForLine and wait
.set currentTextIndex to item last of stack
.delete item last of stack

Goto and Gosub provide good insight into how subroutines are implemented in most language (except Scratch and  Sniff of course which execute scripts in parallel!). We have a list called "stack", and we store the current place we are in the program on the end of the list, before jumping to the destination. When we return, we can just pull that information off the end of the stack, and continue where we left off.

With everything more or less in place (we'll gloss over the details as they're not that interesting), we can run BASIC programs:

>LIST
1 REM THIS IS A TEST PROGRAM
2 PRINT 'MAX?'
3 INPUT M
5X=1
10 PRINT 'HELLO'
20 GOSUB 100
25X=X*3/2
26 IF X>=M END
30 GOTO 10
100 PRINT 'WORLD'
101PRINT X
105 IF X>5 PRINT 'BIG' GOTO 110
106 PRINT 'small'
110 RETURN

This is essentially a meaningless program, but it should all the important bits of BASIC in operation.  The Sniff we've used to do this is all pure Scratch (apart from the save and load routines which are optional), so if you have the patience to drag out those blocks it will work identically in Scratch! One thing old timers will notice is that we're using single quotes for strings - Sniff uses double quotes so writing Sniff code to work with double quotes is tricky you can't write if letter 5 of answer=""" because it all breaks horribly. Using single quotes makes it all work.

Here's the Fibonacci series writtin in Sniff Basic:
>LIST
10 A=1
20 B=1
30 C=A+B
40 PRINT A '+' B '=' C
50 A=B
60 B=C
70 IF C<10000 GOTO 30
>RUN
1+1=2
1+2=3
2+3=5
3+5=8
5+8=13
8+13=21
13+21=34
21+34=55
34+55=89
55+89=144
89+144=233
144+233=377
233+377=610
377+610=987
610+987=1597
987+1597=2584
1597+2584=4181
2584+4181=6765
4181+6765=10946

A while back we write a whole load of numerical code in Sniff, including Newton Rhapson. Well here it is in Sniff BASIC:
>LIST    
10 X=45
20 D=1/10000
25   
30 GOSUB 1000
40 A=F
45 PRINT 'F(' X ')=' A
46 IF A<1/1000000 END
50 X=X+D
55 GOSUB 1000
60 X=X-D
70 M=F/D-A/D
90 X=X-A/M
100 GOTO 30
800    
1000 REM CALCF
1010 F=X*X*X+2*X*X-X-1
1020 RETURN
>RUN
F(45)=95129
F(29.5168)=27428.1
F(19.4329)=8073.43
F(12.6599)=2335.92
F(8.26906)=692.902
F(5.36381)=205.496
F(3.44104)=59.9848
F(2.19622)=17.0436
F(1.43075)=4.59211
F(1.00788)=1.04756
F(0.835609)=0.144332
F(0.803083)=0.00474429
F(0.80194)=7.92742e-06
F(0.801938)=1.19209e-07
>

There's actually something very odd, and possibly unique in this code... Back in the days of BASIC computers couldn't do floating point maths very efficiently so if you owned an APPLE II it came with "Integer BASIC" . In Sniff BASIC the CPU can handle floating point pretty easily, but the getNumber routine only handles integers - to represent non integers you need to use fractions!!!

It would actually be pretty easy to fix that, but I kind of like it. Programming in BASIC is something that we might get nostalgic about, but with Sniff BASIC its a totally rational option!

[you might also think that's the most code I've has ever written for the sake of such a dumb joke but I would a search for "stupid renderman tricks" will prove otherwise!]

Code for Sniff BASIC is included as an example in Release 20

Saturday, 8 August 2015

The Unfortunately Named SniffPaint


One of the researchers we work with is interested in getting kids to design video games to explore social issues (a little like the Serious Play approach). Having worked with groups of children to develop their ideas he approached us to help help them actually turn those ideas into playable games.

This led us to develop the Sprite system we've posted about recently, which makes it easy to write simple Sprite based games in Sniff. In our initial classroom tests this worked really well, and a group of KS3 kids who had never used Sniff before were able to work through a series of exercises and get a working game in an afternoon.

We learnt a lot from that trial, and made a few changes to the Sprite system to make things easier. For example you can now tell a sprite to "move to", or turn by" rather than the more "programmer" style "moveTo" or "moveBy". Well D'uh! Of course that was obvious if you're a kid, but its hard for grown up programmers to remember what it was like to not be programmers. Programming like a kid, rather than like a middle aged guy is why we built Sniff, so we fixed it! The kids' way is better!


One of the things that was surprisingly hard for kids to do as actually make artwork for their games. You would think that this wouldn't be a problem - its 2015! We have a million tools for making images... well no actually we don't! If this was the 80's or 90's we'd have MacPaint or Windows Paint(aka Paintbrush). Now we don't. On Windows 10 "FreshPaint" is an optional "Freemium" install, and costs "from Free to £77.29". I've only spent a few minutes with the free version during which I've been offered several in-app purchases, but I've yet to see anything that actually involves drawing an image!

Of course at the other end of the scale you've got photoshop. While that may be a great tool (not convinced - looks clunky and badly designed!), its certainly expensive and complex. We wanted something that could

  • make basic, low res icons
  • ran on all platforms
  • be learnt in 2 minutes
  • load/save BMP
  • doesn't cost anything
There are some web tools out there that provide some of those features, but getting images out of the web and into the games in the right format was a clunky process.

So we build SniffPaint. It's written if Sniff of course! "Dogfooding" is a great development tool. By writing it in Sniff we get a tool that runs on all Sniff systems, develop and debug the language, and get a really cool demo of how flexible Sniff is. Sniff Paint is included in Sniff R20, both as an executable (just type sniffpaint) and full source (examples/Hosted/sniffpaint.sniff) so you can add your own features if you like. We built the tools using the tools we give you!


SniffPaint isn't going to scare adobe anytime soon! It's very basic, but based on the experiences of the "in house testing team" a 7 year old can produce exactly the sort of artwork we need after only a few minutes. It's not particularly tied to the Sniff code, so you can just use it on its own to generate images for any of your projects. You can even try an online demo version online - just remember the online demo can't save anything, as its running in a sandbox and can't access your real files!

Using SniffPaint

To get started, just click on a colour in the palette and then click a pixel in the canvas. When you're done hit save (hint - up down cursor keys work great in the load/save panel).

Default resolution is 46x46 pixels. This just happens to fit well with the screen size. Hitting HiRes will double the current resolution so you can add more detail. LoRes halves the resolution. 46x46 is a good size for small game objects, 96x96 is about right for larger characters. If you want a nice 8-bit look then design at low-res, and then size up when you're done!


At this resolution drawing a single pixel at a time produces the best results, but you can draw circles or lines by clicking the button, then clicking and dragging on the canvas. Selecting a tool like this is a "one shot" option, and you're dumped back into single pixel mode immediately. If you want to draw lots, use the keyboard shortcuts - just press the letter for the tool you want to select. Dropper allows you to select a colour from the canvas, and fill (sort of) fills areas.

New Internal Bitmap Support

Sniff paint is written in Sniff! In order to make Sniff Paint possible we improved support for bitmap images. Previously you could draw bitmaps on a display using tell display to "draw image" but pushing that file access functionality into the display code was always something that needed looked at, so we fixed it. "draw image" will be available for the next few releases, but gradually we're going to remove it from display devices.

We've now got a new "bitmap" device. It currently only works with the Window device but we hope integrate it so you can use it on any display in the future.

In SniffPaint the default canvas is 46x46 and black, which we can create with:

make canvas bitmap device

when start
.set displayColor to 000
.set displayX to 46
.set displayY to 46
.tell canvas to "new"

Then we can draw it by simply setting the position, and calling draw:

.set displayX to 10
.set displayY to 10
.tell canvas to "draw"

When you draw them bitmaps are automatically "keyed" to remove the background, so you don't need to worry about Alpha (we may add a way to control this inf the future, but the default 

To edit it, we can use 
.tell canvas to "set pixel"

Load and save work with BMP files - not the most up to date format, but simple and easy:
.set fileData to "myDrawing.bmp"
.tell canvas to "load"
.tell canvas to "save"

If you've loaded an image in it can be useful to know how big it is: 
.tell canvas to "get size"
.say join "width:"[displayX]
.say join "height:"[displayY]


The next plan is to use what we've built as part of a 2 day games jam that will take place in September, where groups of kids will build a game over a weekend. We'll announce more details later, but if you interested in taking part let us know.


Friday, 7 August 2015

Release 20: the Scratch2015AMS build


We're off to Scratch2015AMS next week (yey!), so we've been getting everything ready. Among other things that meant copying Sniff onto lots of USB sticks (thanks to the Centre for Digital Entertainment for the very nice USB sticks - they'll be up for grabs next week). It seemed a bit silly to be giving out R19 as we've added loads of cool stuff since then, so that sort of forced the schedule on Release 20. There's a few things in there that are still works in progress, but there's too much good stuff not to take it to Amsterdam.

Key features:
  • Improved Tell notation using spaces
  • Improved Diagnostics (for Tell)
  • SniffPaint
  • Foundation work for MBED
  • Bug fixes

"Tell" is Sniff's way of interacting with external libraries. We write low level code in C then expose it through nice friendly API's. However when things didn't go right, they went badly wrong - telling a device to do something it didn't understand exposed some low level diagnostics that weren't pretty - now they don't. We've also let you include spaces in Tell commands, so instead of telling a sprite to "moveTo" you can tell it to "move to". The old way still works, but the new way is much prettier, and more Sniff like

We've been testing and working with the Sprite code for a while now, but one of the problems was the hoops we had to jump through to make a simple image. What happened to Mac Paint, and Windows Paint.exe (its a freemium feature in win10!)? So we wrote SniffPaint - a simple icon editor that we can use to make sprites, and of course its written in Sniff.

We've also started working on MBED support. This is a whole group of ARM based boards, which happens to include the BBC MicroBit. When we eventually get our hands on one, it should be pretty easy to add support for it. We've been testing with the Nucleo STM32F411 which is really nice and really cheap. STM make a whole range of demo boards for their ARM chips, and sell them for £10. The 411 is one of the more powerful, and it pretty ideally suited to running Sniff. The actually code works great on MBED, but setting everything up is hard work. We should be able to set things up more easily for the MicroBit rather than trying to work with all MBEDs. If you've got an MBED and you'd like to try it with this release get in touch - we'd love to work with you and support as many boards as possible.

Check the Downloads page to get your hands on the new code!

An Arduino Shopping List

Over the years I've collected a lot of Arduino bits. If there's a shield or component out there, then I've probably got one. I justify this as "I need it so I can support it in Sniff", but I've found that some hardware "sticks" while some just goes in one of the many little wooden drawers I have. Some of the Sniff "devices" code get used and tested over and over as I build them into new projects, while others sort of get forgotten.

One of the things I've definitly learnt is that cheap is cheerful! When I run a workshop I like to be able to hand out equipment without worrying if it gets damaged (or better yet, build it into the costings and let people take it home). On the other hand my Arduino Tre doesn't get stuff plugged into it - I don't particularly want to accidentally short out pins on a £150 board.

At various times I've tried to summarise what I've learnt and design the ultimate "arduino kit", but its tricky - there's always some great component that you could get that for just a few more pounds. So instead, I'm going to just make a list of things I think are cool starting with some basics, moving onto some components I think everyone should have, and then a few optional, but still recommended parts. You can get everything except the last few parts only spending around £30 if you shop hard enough.

I've also learnt most of the places to look for cheap equipment - Ebay is first stop. Don't worry about buying direct from china. It takes a few weeks to arrive, so plan ahead, but the prices are great and the odd thing that doesn't work out will cost less than the amount you save by buying direct. Once you're a bit braver check out Ali Express - If you've not heard of them, that's because you're not in Asia. They're bigger than Amazon and Ebay put together, their sellers want your custom, and will price to get it. You don't need to worry about sending cash through AliPay - its a big, seriously legit operation.

Arduino Uno [copy/clone] £5

The Uno is the Arduino. Other boards are more powerful, faster, bigger, smaller, but you need an Uno. I've got about 25 kicking round here right now. Some are going to Scratch2015AMS next week, some are for a robot workshop later in the year, some are just my testing boards. I've bought real boards, I've promoted the Arduino brand pretty heavily. I'm comfortable buying clone boards for very little money. Support the Arduino group - they do good things. Buy some stuff, contribute to the project, but I don't feel bad for buying Uno's from whoever can make them cheapest - this is open source at its best!


Sensor Shield £3


These are THE BEST way to plug together projects - I rarely use breadboard. They're going to make your life easier. They come in different versions, but you probably want the version 4. This is a really common version that works great with the Uno. I've recently got a V8 and that's nice too, but harder to find cheaply. Most of the other versions are not as well laid out.

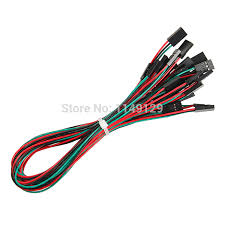
3Pin Female Dupont Cables, from 20p each (buy lots!)

On the breakout board, each arduino pin gets turned into a group of three. Each group carries 0v, 5V and Signal. This is the standard connector used for Servo's, but we can connect many of things to it. It really helps to know they're called "dupont" connectors.

(female) Jumper cables (£3 for lots!)

Most jumper cables are designed for breadboard, so are male-male. You want some of those, but you also want male-female, and female-female. Cheap to buy in bulk - painful and frustrating when you run out.

Green Nail Varnish £1


In addition to making a bold fashion statement, we have one problem to resolve before we have the perfect component hookup system. We need to remember never to plug the cables in the wrong way around! A stripe of green nail varnish down the side of the plug, and a dab on the side of the socket indicates which side is 0v/Ground/Earth and you'll always know which way around to plug them in! Seriously this is the best advice you're going to get all week. It will save you from a lifetime of pickup components and trying to remember which wire is earth!

So far we've spend about £15, and all we've got is some cables but they're basics that will set you up for future projects. Now its time to buy some parts:

DHT11 £1


This is the classic Arduino component. Cheap, and fun. It has four pins but only three are used. Cut a 3pin dupont cable in half and wire up appropriately (I guess you might need to buy a soldering iron - or ask a friend to help you).  Now you can plug it straight into the breakout shield, and start measuring temperature and humidity. The DHT22 is a more accurate version for about £3.

i2c 1602 LCD Display £4


Shop around - these 2rows 16 column displays are great, but the 20x4 versions of the same thing are about the same price. Bigger is better in this case. You want the i2c version because its going to plug straight into the sensor shield (don't try and wire up an LCD screen directly - you'll just use lots of wires and not save enough for it to be worth it). If you've got the v4 shield then set the jumpers to i2c, and just connect them using a...

4pin dupont cable(s) £2

You'll only need a few of these, but now you can display measure temperature, and display it on the screen.

Data Logging shield £3

These are an easy way of hooking up an SD card to you can record data and a DS1307 real time clock, so you can record what time you record the data. If you've got the v4 sensor shield you can plug them both in at the same time (doesn't works so well with the V8...).

LEDS and Resistors £3

You'll be able to get a bag of LEDs and resistors for about £1. We need whatever LED's you like the look of, some 1K resistors and some 10K. Cut a jumper cable in half, and solder a 1K resistor in series with the LED. Now you've got an LED you can just plug into the sensor shield. The resistor is baked into the cable so you can't break anything. 1K is slightly bigger than it needs to be but that just makes it a bit safer (and the LED is a little less bright). In addition to being an LED you can flash, you can also use this for dignostics - either by writing code to signal using the LED or simply putting it on an output to see that the output is changing - cheaper, and easier than a multi-meter (though they're good too!)

Light Dependant Resistors (£1)

Another "get a bag full for £1" component is the LDR. Wire a 1K resistor from power to signal, and the LDR from signal to ground (or the other way round - both ware fine), and you can measure light levels. That's useful, but with a bit of creativity you can use it as an optical switch, or motion detector.

Waterproof DS18b20 £1

It's another thermometer, but its WATERPROOF, and on the end if a cable. Handy for all sorts of experiements. Wire them up to a dupont connector (and hack a pull up resistor into the cable) and they just plug straight in to the sensor sheild whenever you need one.

HC-SR04 £1

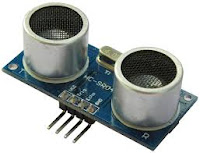
Ultrasonic distance sensor - Another Arduino classic. These are pretty hit and miss. Maybe I had a bad batch, but when they work they're like magic. They use four pins (0v,5c, trigger, echo) so they don't quite fit our 3pin hook up model. For simple coding you'll need to hook them up with jumper cables. However its actually possible to just connect trigger and echo together, so they WILL work with 3 pins. Sniff doesn't support bi-directional pins (its not something thats needed for the sort of stuff we do), but after you've coded it yourself using separate trigger/echo there's a hcsr04 "device" which lets you just use 1 data pin, so cut a 4pin cable, and splice to a 3pin one for simple hook up.


So far we've spent about £30 but we've got a pretty cool bag of bits. Where you go next is up to you, but I'd seriosly consider:


I2C 128x64 oled display (£5)

These come in various versions, but the i2c variant is the easiest to hook up. With bit of planning i2c is easy to plug and play, but I'll post that a different day... This is one of the reasons we bought 10K resistors (10K pull-ups to 3.3v work great!).

Ethernet Shield (£5)

Connect your gadget to the internet! Not as cool as WIFI but much cheaper, and it includes a microSD slot.

Motor Shield (£2)


There are "better" motor driver options, but being able to drive 4 high power motor in a simple and cheap shield is a big win. Again - shop around for these and plan ahead. They're less than £2 direct from china, but there are plenty of people ordering them from the same place you could and relisting them on EBAY for £10. Just remember to allow up to 4 weeks for shipping. There are UK and US sellers doing great work developing cool products and resources - support them, rather than the ones drop shipping from chain with a  400% mark up!

MQ series gas sensor (£4)

Detect various gases. Ignore the digital output and hook is power and Analog out to a 3pin connector.

NeoPixel Strips (£15 per meter)

Not cheap but seriously cool. For about £15 you can get a 1m strip with 30 tricolour LEDs on. If you're on a budget, chop them into smaller strips and split the cost with a friend. 6 LEDs would cost you £3 that way, and that's enough to start playing with. Again these connect to a 3pin DuPont, and plus straight in.


With all that in your bag you're ready to tackle loads of fun projects. I'm sure I've missed something... Leave a comment and tell me about a great and cheap component that you can't live without.